Thursday, April 28, 2011

Sourdough Ciabatta - AKA Dave


From Food pics


A few weeks ago, I took on the challenge of making a loaf of sourdough ciabatta bread. This was actually a quite a big challenge - It took 9 days for me to make this bread. Yup, you read that right. 9 days for one loaf of bread (ok, technically it was 2 loaves).

Why so long to make bread? Well, a few things need to happen to make any kind of sourdough - the first being the development of a "sour starter". The purpose of a sour starter is to develop a lightly acidic flavor common to sourdough. This is done by allowing "wild" yeast present in the air and flour to feed and cause fermentation in the starter. The starter needs to be fed every day, and this was actually quite creepy. I would read things like "The first thing to remember is that the starter is a living thing. It needs to be fed and cared for regularly." So here I have in my kitchen a large bowl of something growing and fermenting and demanding to be fed daily. Because it stopped being a thing and started to be a someone, EJ and I decided to name him Dave.

From Food pics


Wednesday, April 27, 2011

Weeknight Stirfry

Too lazy to cook but you still need to eat? Fear not - This is the easiest stir fry you'll ever make. It came together in under 20 minutes, and there are totally a few shortcuts you can take if you have even less time. There's not much for cleanup, either!

I just used what I had in the house - you could take this any direction you want! Scramble an egg and throw it in (don't crack the raw egg into the dish and cook it in the dish - I've done that before and its not the same), add some sprouts (yum!) or any random veggies or beans that you have on hand.

Ingredients:
1 cup brown rice
2 cups water
1/2 block of extra firm tofu
about 1 cup frozen broccoli
about 1/4 cup slivered almonds
several shakes each of soy sauce and rice vinegar

1. Cook the rice. I have a rice cooker that I am obsessed with. I can never get the proportions rice : water to be perfect for brown rice - its always too dry. After the rice was done, it wasn't completely cooked, so I added about 1/2 c more water and cooked again. This time it was perfect.

2. While your rice is cooking, get your tofu. I didn't even drain mine - I just gave it a good squeeze over the kitchen sink. Cut it into cubes and saute for about 10 minutes, until its mostly brown.


From Food pics


3. Grab whatever veggies you're going to use. I basically always have frozen broccoli and/or brussels sprouts on hand for nights like this. I used broccoli this time. To thaw it, I threw it in a saucepan with a little water, covered, and heated it for about 4 minutes, until - and this is a no brainer - the broccoli is thawed. (You can use the same wok or skillet that you cooked your tofu in, just remove the tofu first.)

4. Throw everything together in a wok or skillet, add the sauces, taste for flavor, and you've got yourself a weeknight stir fry!


From Food pics

Saturday, April 23, 2011

Recipe Improv: Vegetable tempura with quinoa and arugula

Last week I asked 5 friends to name the first ingredient that came to their mind. The ingredients were: quinoa, potatoes, zucchini, peas, and arugula. The challenge? I have to make a meal out of it. This was fun, and I got to be a little creative with what I made. Obviously there are a million combinations, but I settled on vegetable tempura over quinoa with an arugula salad. Totally awesome, if I do say so myself.

So check out the pics and the recipe below. I'd like to do this more often, and I need your help. The first 5 comments with ingredients will be my next meal! (ok, not my next meal, but you know what I mean).


From Food pics

Wednesday, April 20, 2011

Apple-Carrot-Ginger Juice

Demitri Martin thinks that oranges were named before carrots...I think he must be right.

Anywho - I got my juicer about a year ago. They can be expensive, so I got a refurbished one from Amazon. Its worked great - its not super snazzy like some the ones out there, but it does the trick and cleanup isn't too terrible. I don't juice a lot - I want to get more into it. So, here's a call for suggestions: I want to hear what YOUR favorite juice recipes are!

Apple-Carrot-Ginger is pretty sweet and tasty. I feel that I should just mention that I adore ginger, so I added a lot of it here - so much that it burns my tongue a little when I drink it. If you're not so keen on the ginger, I would add it little by little until you find an amount that you're happy with.

This made about 32 oz.

Ingredients:

5 apples (mine were Gala)
1 lb carrots
3 tbsp fresh ginger root

1) Wash all your fruits and veggies and cut them into pieces larger enough to fit in your juicer. You don't have to peel them, even the ginger, but you should remove the apple seeds because they contain trace amounts of cyanide. It should be harmless, but you never can be too careful, right?

2) Juice and enjoy! Throw in an ice cube and sip it on your back porch, while swinging in a hammock listening to the most current indie music.

From Food pics

Tuesday, April 19, 2011

Monday, April 18, 2011

Focaccia

My brother-in-law got me this awesome artisan bread book for Christmas, and I've been experimenting making bread the "old fashioned" way. (Wait until you see my post later this week about what I'm growing in my kitchen...I call it Dave.)

Anyway, I made this focaccia a few days ago and I LOVE it. Its a 2-day recipe, so make sure you plan ahead if you are making it for a special occasion. It keeps really well - I sliced it and have been keeping it in the fridge and grabbing a piece every time I go in the kitchen. Don't be intimidated by the semi-complicated bread recipes. They're not so bad.

You can do anything in the world for toppings, I used a combo of sea salt, pepper, garlic powder, onion powder and rosemary with a pinch of cheddar cheese. Be creative - just don't overdo it. Its a focaccia, not a pizza.

Ingredients:
For the biga:
1/2 c water, 55 degrees F
1 1/3 c bread flour
a pinch of instant dry yeast

Final dough:
2 c water, 86 degrees F
biga from the previous day
3 tbsp olive oil
5 c (plus 2 1/2 tbsp) bread flour
2/3 tsp instant dry yeast
1 tbsp salt

1. Make the biga the day before you want to serve the bread. A biga is a type of preferment (literally, PRE-ferment. What you're doing is fermenting some of the bread ingredients prior to making the bread). Put the water in a bowl and combine the flour with the yeast. Mix in with the water until it is totally homogeneous. Mix it well - this step is important. The biga should be stiff and slightly dry. Place it in a lightly oiled bowl (big enough for it to double in size) and refrigerate for 2 hours. Remove, and let it sit at room temperature for 10-12 hours (though, honestly, mine was a lot closer to 20 hours and it was fine).

2. The next day, make your final dough. Put the water, biga and oil into a large bowl and break the biga into lots of tiny pieces; this will take at least 5 minutes. Combine the flour and yeast together and add them to the biga mixture while stirring. Add the salt, and work the mixture with your hands for at least 5 minutes. Make sure the biga is completely broken down and a new, homogeneous dough is forming. The dough will be VERY tacky and wet, and lack structure. Cover the dough and let it rest in a warm place for 45-60 minutes.

3. Place the dough on a lightly floured countertop and fold it into thirds (this really doesn't have to be perfect - all this does is expel air out of the dough...but be gentle). Cover with plastic wrap and let it sit 10 minutes.

4. Uncover the dough and divide it into 3 equal size pieces. On a cookie sheet lined either with parchment paper or a lot of flour and cornmeal, place each loaf and lightly round each one. Next, stipple the dough with your fingertips (fingertips should be dipped in olive oil). Basically poke it a whole lot. This helps keep the bread from puffing while baking, but it also gives each focaccia a unique texture and allows it to hold toppings. While you're doing this, work on stretching the dough into roughly a 10x6 inch rectangle. Lightly cover the dough and let it sit for 30-40 minutes. When toughed, the dough should spring back halfway.


From Food pics


5. Preheat the oven to 375. Prepare the toppings for the focaccia.

6. 10 minutes before baking the bread, place an oven-proof dish with 3 cups of water in the oven (to produce steam while the bread is baking).

7. Uncover the dough and lightly stipple it again. Add the toppings. If you have a baking stone, slip the bread onto that. If not, just leave it on the baking sheet (I've said it before and I'll say it again - if you don't have a pizza stone, get one!).

8. Immediately reduce the oven temperature to 350.  Bake for 18-20 minutes, then remove the water and bake for another 5. You want it browned and crisp, but not overdone. I actually took mine out a little early because I wanted the bread soft. This came out amazing. I served mine cut like breadsticks and with marinara sauce (served? who am I kidding? I ate it all myself!!)


From Food pics

White Bean Pate

This was the last of my "Pantry Challenge" recipes. It was really fun and I certainly enjoyed making room in my kitchen for new food, but now I'm happy to be trying out some new recipes this week.

White bean pate was super easy and yummy. I ate it with these fancy rosemary crackers that i got from the Sweet Grass Dairy store in Thomasville. Its a lot smoother than hummus, which is exactly what I was going for. I used canned navy beans, so they blended really easy. I actually just used a potato masher to blend them - I never even needed a mixer!

Ingredients:

1 can navy beans
2 tbsp ranch dressing (I would have used tahini if I had any)
several pinches thyme
several pinches black pepper
onion and garlic powder

1). Mash everything up until smooth. Taste for spice levels.


From Food pics

Saturday, April 16, 2011

Flour Tortillas

I also made these during my pantry challenge, but didn't get a chance to post them. My friend Joanne gave me this recipe a few years ago, and I forgot I had it until now. Making these tortillas was much easier than it sounds, and they came out amazing! You can fill them with all kinds of yummy fillings, or just eat them plain!


From Food pics


Yield: 12-14 tortillas

Ingredients:

2 1/2 c flour
1/4 cup vegan margerine (melted)
1 tsp salt
3/4 c hot water

1. I melted the butter in the hot water. Mix all the ingredients in a large bowl.

2. Knead the dough for about 5 minutes, or until its homogeneous. There is no need to do it on the counter top - I just kneaded it right in the bowl.

3. Tear apart golf ball size chunks and roll them into a ball with your hands. On a very lightly floured counter, roll each ball out with a rolling pin until it is as flat and round as you can get it. Seriously put some elbow grease in here - the flatter, the better.

4. Cook each one in a nonstick frying pan for a couple minutes each side. I don't think you need to use oil - I used a tiny bit of spray oil for my first few, but then figured I didn't need it, and the rest came out just as good. Careful not to overcook these - overcooking will make them stiff.


From Food pics

(This one is filled with spinach, salsa, black beans, and a little cheddar cheese - delish!!)

Pantry Challenge Day 7 - Mexican Pita Pizzas


Didn't I say I'm moving towards an empty pantry? I seriously need to go grocery shopping! These mexican pizzas were exactly how they look - fast, filling and pretty tasty. I mean fast, they went from fridge to plate in under 10 minutes. Not the most nutritious of meals, but they'll do when there is nothing else in the house!  

Ingredients:
4 pita pockets, carefully pulled apart
1 cup refried beans (if you buy a can, make sure they’re vegetarian!)
½ cup salsa
1 cup shredded cheese (I used part skim mozzarella)
About ¼-1/2 cup sliced green onions

 Preheat oven to 350 
 On each pita, spread about ¼ cup refried beans
 Then spread salsa 
  Sprinkle with cheese
  Bake at 350 for 7 minutes, until cheese is melted and pita is crisp
 Garnish with green onions.

From Food pics

Friday, April 15, 2011

Pantry Challenge Day 6 - Crumbled veggie burger breakfast pita

I am definitely moving towards an empty pantry! This recipe took about 5 minutes to make, and it was surprisingly tasty. Also, by trying this recipe, I inadvertently discovered that cream cheese smeared on a veggie burger is a very tasty snack!

Ingredients:

1 egg
1/2 veggie burger (I used an Amy's veggie burger; it was quite large so I only used half)
1 tbsp ranch dressing
cilantro
salt, pepper
2 tbsp light cream cheese
2 tbsp salsa

1) Microwave the burger until its no longer frozen (it doesn't need to be heated through, but you do need to be able to break it up)

2) Crack your egg in a bowl, add the salt, pepper, and ranch. Whisk until its blended.

3) Crumble your burger into a small non-stick skillet over medium heat. Add the egg mixture. I added my cilantro here, but it was a cilantro paste that comes in a tube. If you're using fresh cilantro, I would wait a little longer to add it.


From Food pics


4) While you're waiting for your eggs to cook, you can prepare your pita. By prepare, I mean spread some cream cheese and salsa in it. You could toast the pita, but I left mine untoasted.

5. Scramble the eggs, but don't break them up too much - leave the pieces large.

6. Stuff the pita. Add some salt and pepper if it needs it. Enjoy! (Add some fresh spinach or baby greens here if you have any!)


From Food pics

Thursday, April 14, 2011

Pantry Challenge Day 5 - Farfalle with crumbled tofu

Wow, I'm on day 5 already? Well, the rest of the recipes will be a little more pantry-esque, but they will still be tasty (I hope)!

Farfalle with tofu was good - I accidentally added way too much pepper. It was still ok, just a little overpowering. The fresh basil was nice (I keep a large basil plant in my kitchen), though I really wish I had a few garlic cloves in the house. That would have added a better flavor. Cheese makes things taste better - Romano cheese sprinkled on top would have added a lot here.

Ingredients:
1 block firm or extra firm tofu, drained
1 can diced tomatoes
1/2 box farfalle pasta
2 tsp olive oil
4-5 leaves fresh basil
salt, pepper, garlic powder, onion powder

1) Bring a pot of salted water to a boil. Cook the pasta until al dente.

2) Drain the pasta and return it to the pot. Add the oil, spices, tomatoes (drain them) and taste for spice levels.

3) Crumble the tofu in your hands until it resembles feta cheese and drop it in the pot. Heat for about 10 minutes, until the tofu has lost its extra liquid and is heated through. Add the basil. Enjoy!


From Food pics

Wednesday, April 13, 2011

Pantry Challenge Day 4 - Jerk Seitan with fruity quinoa

My favorite description of jerk flavors is, of course, from Isa Moskowitz. She says that when you're putting the jerk seasoning together, you're thinking that there is no way that these flavors will go together. When the final product comes out and you taste it, you're a jerk for ever questioning.

I used a prepurchased block of seitan that had been sitting in my fridge for weeks. I'm out of vegetables, so I was hoping that by adding some dried fruit to the quinoa then that would count...sort of.

Jerk seitan

Ingredients
seitan, cut into bite-size pieces
red pepper flakes, to taste
1 tsp thyme
1 tsp onion powder
1 tsp garlic powder
1 pinch each of allspice, nutmeg and cinnamon

1) Put everything in a non-stick skillet. Saute for about 5-8 minutes, until the seitan is heated through and slightly browned.

Quinoa

1 cup quinoa
1 cup vegetable broth
handful dried fruit - I used about 1/4 cup each of dates and cherries
1/4 cup crushed pecans

1) In a saucepan, bring the veg broth to a light boil. Add the quinoa. Reduce heat to low,cover, and cook 15 minutes stirring occasionally. Taste it to make sure its done; it may need a few more minutes. The measurements here are less finicky than when you're cooking other things, like rice. If the quinoa starts looking dry before it is done cooking, add some water or broth. If its done but still kind of watery, just let the cover off the saucepan and let it evaporate over low heat.

2) When the quinoa is done cooking, stir in the fruits and nuts. I was thinking of adding some curry spice here, but I decided against it because the broth made it so flavorful.


From Food pics

(This is really one of those times that I wish EJ was here to do the photography; he would have made this dish much more appetizing than I can. But I promise - it was really good!!)

Tuesday, April 12, 2011

Pantry Challenge Day 3 - Chick-pea salad pitas

Obviously I wouldn't cook something that I didn't think would turn out good. I was interested in how these would turn out, but I was blown away when they ended up being AH-MAZING. I wish I had about 3 more cans of chickpeas so I could eat these every day! The carrots and onions give it that kick and crunch, though I do wish I had some celery to chop up in there. If you so desire, add a bit of relish to the recipe (I strongly dislike pickles and relish). A potato masher worked well for the smashing, if you're making a large batch (which you should) a blender or food processor on a pulse setting might be better.

Ingredients:
1 can chickpeas
1/3 cup fat free mayo (or vegan mayo)
3 tbsp fat free ranch dressing
1/4 cup matchstick carrots (mine were quite long so I broke them into smaller pieces by hand)
scant 1/4 cup chopped red onion
1/2 tsp thyme
several shakes of garlic and onion powder
about 1/2 tsp fresh cracked black pepper
a few pinches of salt (to taste)

1. (This is easy) Mash everything up in a bowl. Taste to make sure you like the flavor combo. Spoon into a pita pocket and enjoy!! If you have some lettuce or tomato to put in the pocket as well you should definitely go for it!


From Food pics

Monday, April 11, 2011

Pantry Challenge Day 2 - Potato Rosemary Pizza

Ok...potatoes on pizza...I know its a little weird but just bear with me for a moment. The first time I had a potato pizza was in Cambridge (MA) at Cambridge 1 and I was blown away. I decided to give my own version a try, and it came out great!

From Food pics


Ingredients:
1 recipe Basic, all purpose dough
1/2 potato
1 cup milk
3 tbsp flour
3 tbsp fat-free cream cheese
1 tsp rosemary
several shakes of onion and garlic powder
salt and pepper, to taste
1/2 cup shredded cheddar cheese

1. Prepare the dough as directed. Shape into a pizza pie. Preheat the oven to 500.

2. Make the rosemary cream sauce. Put the milk in a saucepan and heat. Just before it boils, add the flour and whisk. Allow to boil for about 10 seconds and whisk constantly for a minute or two. The mixture should have thickened; if it didn't, try adding more flour and let it boil again.

3. Remove from heat and stir in the cream cheese, onion, garlic, salt and pepper. Taste for flavor.

4. Place the potatoes in a single layer on the pizza. Spread the cream sauce as evenly as possible over the potatoes and sprinkle with rosemary. Add the cheese on top of that.

5. Bake for 8-10 minutes, or until the crust begins to brown.

From Food pics

Sunday, April 10, 2011

Pantry Challenge Day 1 - Pomegranate tofu with roasted potatoes

These were really nice. The pomegranate molasses added a bit of fruit flavor without the sweetness, so it still felt like a savory dinner dish. I did have to buy the molasses online - I purchased it several months ago for a different recipe.

Baked Tofu

For the marinade:
1 cup vegetable broth
2 tbsp balsamic vinagrette
1 tbsp pomegranate molasses
1 tsp thyme
lots of shakes of garlic and onion powder
salt and pepper, to taste

1 block firm or extra firm tofu

1. You'll definitely want to drain your tofu for this. Place the block of tofu on a plate, and put another plate over it. Place a heavy object on that plate. You'll have to discard the tofu juice every once in a while. I let mine drain for an hour.

2. Slice the tofu and put in a bowl with the marinade. Let marinate for at least an hour, but overnight is better.

From Food pics

2. Preheat the oven to 375. Spray a casserole dish with cooking oil. Bake the tofu for 20 minutes, then flip each piece and bake another 10 minutes. Serve with a little extra marinade.

Roasted Potatoes

Ingredients:
1 potato (I think mine was an Idaho...?)
Spice blend (I used the peppercorn salad dressing spice blend from Penzey's, but I think any combo of garlic/onion/salt/pepper with some sage or thyme would have been great.

1. Slice the potato into pieces that are about 1/2 an inch thick and place immediately into cold, salted water.

2. Bring the water to a boil and let it boil for 15 minutes.

3. Spay a cookie sheet with oil. Line the potatoes on the sheet and sprinkle with your spice blend.

4. Roast the potatoes in your preheated oven for 10 minutes. (Yes, I'm aware that it is possible to roast potatoes without boiling them first, but I wanted to use half of this potato for another recipe...check back later this week to see it).

From Food pics

Peanut-choco-banana protein shake

EJ and I are obsessed with these. I like to make them after a hard workout - when I come back from a long run there is nothing better (and combined with a foot massage from my husband...heaven).

Ingredients:
1 banana
1 cup chocolate ice cream
2 tbsp peanut butter
1/2 cup milk (add more if the shake is too thick)
1 scoop protein powder (we use Publix brand vanilla)

Blend. Enjoy.

From Food pics

Thursday, April 7, 2011

Not-so-bad-for-you stuffed french toast - Take 2!

This version is actually vegan, and in my opinion it tastes much better. I didn't care for the egginess of the previous recipe, and this version eliminated that.

Ingredients:

1 slice of bread, cut in half
2-3 tbs chickpea flour
1-2 tbsp milk
1 tsp cinnamon
a pinch ground cloves
a pinch nutmeg
2 tbs vegan cream cheese
2 tbs your favorite jam or preserves (I used pear with honey and ginger)

1. Spread the cream cheese on both sides of the bread, and spread the jam over one of those. Put the bread together like a sandwich.

2. Mix the flour with the milk and spices; whisk. Make sure there are no lumps.

3. Soak the sandwich in the flour mixture.

4. Heat a small skillet (medium heat) and spray with cooking spray. Cook the sandwich on both sides until golden brown.

5. Dust with powdered sugar or cinnamon sugar. I ate mine with just a little maple syrup. Yum!
From Food pics

Wednesday, April 6, 2011

Spinach and red pepper frittata

Frittatas are like a more healthy version of the quiche. To me, most of the deliciousness of the quiche is found in the crust, but when you want to cut some calories and not sacrafice protein, a frittata is the way to go. I've filled mine with red bell peppers and spinach, but you can add anything really.

From Food pics

Ingredients:

10 eggs
1/2 cup milk
a large handful fresh spinach, washed
1/2 red bell pepper, sliced
3/4 cup shredded sharp cheddar cheese
1 tsp salt
a few generous grinds of cracked black pepper
1 tbsp fat-free ranch dressing (my old roommate taught me about this - I put ranch in all my eggs)

Preheat oven to 350

1. Take a large pie plate and spray with cooking spray. Set aside.
2. Whisk together the eggs, milk, salt, pepper, and ranch. Make sure its mixed well, the ranch can put up a fight.
3. Take the veggies and put them in the pie plate - mix them up. Put about 1/2 the cheese in there too.
4. Whisk the other half of the cheese with the eggs.
5. Pour the egg mixture into the pie plate over the veggies.
6. Sprinkle a little salt and pepper over the eggs.
7. Bake for about 30-35 minutes, until the frittata is puffed and golden brown, and the center is firm.

Not-so-bad-for-you stuffed french toast

I'm always sorely tempted when I go to an IHOP or Denny's and see the stuffed french toast. I've never gotten it because I imagine its similar to eating an entire funnel cake by yourself, but dang it looks good! (I'm not going to lie, I'm also tempted by the grilled cheese/mozzarella stick sandwich at Denny's...but I digress).

This recipe was pretty tasty - I actually made it for a dessert rather than breakfast. I used low-fat cream cheese and 1 egg white to cut calories. I'm tagging this as vegan because I'm also including a vegan version, though I didn't make the vegan version myself.

Ingredients:
1 slice of bread, cut in half
1 egg white
2 tbsp milk
1 tsp cinnamon
a pinch ground cloves
a pinch nutmeg
2 tbs cream cheese (but I bet this would be awesome with brie)
2 tbs your favorite jam or preserves (I used pear with honey and ginger)

From Food pics

1. Spread the jam on one side of the bread, and the cream cheese on the other. Put together like a sandwich.

2. Mix the egg white with the milk and spices; whisk

From Food pics

3. Soak the sandwich in the egg mixture. The egg should coat both sides, and you can press the bread to make it really absorb the eggs.

4. Heat a small skillet (medium heat) and spray with cooking spray. Cook the sandwich on both sides. Here is where had a problem - runny eggs gross m out to the point that I am super paranoid and always overcook eggs. I stopped cooking the french toast at the time when I thought other people would like it and that was when I took my photographs. Then I put it back on the stove and purposefully overcooked it.

5. Dust with powdered sugar and enjoy! I added a little more preserves to mine as well.

VEGAN VERSION:
Obviously use vegan cream cheese (or leave the cheese out all together)
For the "egg" mixture, mix 2-3 tbsp chickpea flour with soy milk and add the spices. Cook as above.

From Food pics

Tuesday, April 5, 2011

Rice Cake Snack

So this isn't really a recipe...and yet it might be my favorite food on this blog! This is my go-to snack when I need something sweet, salty, and somewhat filling. Yum!

lightly salted rice cake
about 2 tbs peanut butter (i like publix brand reduced fat crunchy)
about 2 tbs chocolate chips

Spread peanut butter on rice cake
Sprinkle with chocolate chips
Enjoy!

From Food pics

Seitan pockets

These were really easy and fun to make. They also made fabulous leftovers. You can really fill them with anything you want - be creative!

Ingredients:

1 recipe Basic, all-purpose dough
1 package seitan
2-3 tbs soy sauce
a few shakes liquid smoke
2-3 tbs vegetarian-friendly steak sauce (I like the Annie's Worchestershire)
About 1 cup shredded cheese (for these, I prefer a sharp cheddar)

Preheat oven to 450

1. Prepare the dough. On the final rising step, you can prepare the seitan.
2. Cut the seitan into strips and saute in a small amount of oil for about 7 minutes, until slightly browned. (Yes, I know its already brown).
3. Add the sauces and saute a bit more. Taste for flavor.
4. Cut the dough into about 6 pieces of equal size. Flatten each piece so that it is about the thickness of a pizza crust. Shape into a circle if you can. Place about 1/6 of the seitan mixture into the lower-center of the dough and top with cheese. Fold the dough over the filling. Press the sides and corners - you can roll them a bit to make them look pretty. Brush the top of each pocket with milk or egg yolk.
5. Bake about about 450 for 8-10 minutes, until the dough is browned.

From Food pics

Your Basic All-purpose dough

Ingredients:

1 package active dry yeast
1/2 cup warm (not hot) water
1 tbsp sugar
2 tsp salt
1 tbsp olive oil, plus a little extra
3 cups flour, plus extra for the counter top

1. Proof your yeast. Dissolve the sugar into the warm water and add the yeast. Stir the yeast until it is just wet, don't over stir. Let it hang out for 5-10 minutes; it should start getting frothy and foamy. If it doesn't, get a new package of yeast because the first one is dead. (To be completely honest, I usually skip this step).

2. Prepare a large bowl for the dough to rise in. Pour about a tbsp olive oil in it and set aside.

3. Assemble the dry ingredients in a large bowl. I only add about 1/2 the flour, because I have made the mistake before of adding way too much flour and that makes your dough very tough. So I add half the flour and add more as i need/knead it.

4. By now the yeast should have proven itself to you. Add the yeast mixture and the oil to the flour and salt and stir. Add flour until you can't stir any more (you won't get very far).

5. Sprinkle some flour onto a very clean and dry counter top. Dump your dough on top of it and any flour that might have gotten stuck in your bowl. Knead it around, it likes to be beaten up. Add more flour if the dough gets sticky. You should be kneading for 5-10 minutes, until the dough is nice and stretchy.

6. Form the dough into a large ball and place in prepared bowl. Swirl it around in the oil a bit so it doesn't stick. Cover with a damp, clean kitchen towel and place in a warm dry place to rise. Go away for about an hour.

7. When you come back, the dough should have doubled in size. Make a fist with your hand and punch that dough right in the face. Go ahead, just do it. You will feel the dough deflate a little; that's ok. Turn the dough out onto the floured counter top again and knead for a couple of minutes.

8. If you are not going to use all the dough, take a knife and cut the dough in half, wrapping one half in saran wrap and freezing. If you are going to use it all, skip that step. Take the dough that will be used and put it back in the rising bowl, cover, and go away for at least 15 minutes, but an hour is better.

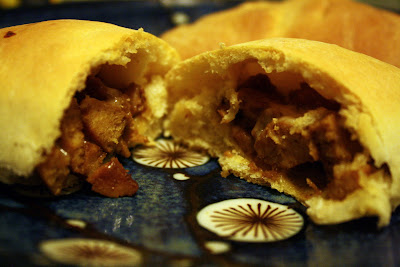
9. Now you can prepare whatever you want. After I have made my pizzas, bread dough, hot pockets, whatever, I tend to let the dough rise one more time, just to get that fluffy texture. This isn't totally necessary though.